-
Introducing the Forensics Fundamentals Series
I’m happy to announce a new series of posts which will cover some of the fundamentals of digital forensics. The audience for these posts won’t necessarily be my peers in the digital forensics community, but my peers within the legal profession. Hopefully it will be a good resource for attorneys who are wanting to use digital forensics more in their practice or forensic investigators who want to bring their clients up to speed with some of the basic vocabulary of the field.
The seasoned forensic investigators will likely notice that I may gloss over some of the more nuanced points, but keep in mind when reviewing these that the articles are tailored to those who want to get a grasp of the fundamentals first without getting lost in a dizzying discussion of technical details.
If there are any topics that you’d like me to cover, feel free to drop me a line.
-
Forensic Fundamentals - Disc Images
##What is a Forensic Image?
A forensic image is a bit-for-bit copy of a digital storage container. This copy includes both data that is accessible to the user (allocated space) and that may have been “deleted” by the user but not overwritten (unallocated space). Forensic images offer stability and flexibility to an investigator that can’t be found with consumer like formats. Forensic images can be mounted so that a user can browse the contents of a hard drive as if they were the original user without changing volitile metadata. They can be used to recover lots of peices of evidence using specialized tools in conjunction with commerical or open source forensic utilities.
##File Formats
There are a few different file formats that one can use when acquiring a forensic image. Some formats have additional features than others, but may not be as flexible for certain tasks like recovering data from Volume Shadow Copies.
###The DD or RAW format
While it may be more precise to refer to these images as RAW images, it’s very common to hear them referred to as DD images. Why DD? DD is the tried and true Unix utility which has been used to make bit for bit copies of discs or volumes since the mid 1980s.
Generally, the file format is not compressed and contains no metadata about the image itself, but it can be split into multi part files. Personally, I preferred the use of more modern formats because of the compression availability but recent experience with some Volume Shadow Copy utilities that work only with DD are making me question this preference.
DD images can have a number of extensions including .dd, .raw, .00 or .IMG.
###The Encase or Expert Witness Format
Generally if you’re not getting a DD image from a forensic analysist then they’ll likely give you an EnCase image. I think it’s important to understand that while this format’s common name implies the requirement of a specific piece of software, the EnCase format is supported by many different peices of software.
Encase Images can be compressed, which is a big advantage if you’ve got a case involving multiple computers and large quantities of data. With the price of 2TB drives coming way down, you can carry and entire office worth of compressed disc images on something that would fit into your pocket.
Encase Images can also carry user defined metadata about the image such as the name of the examiner who took the image, date of acquisition, client-matter (or case) number and some acqusition notes. Encase images ususally carry an extension of .E01.
Even if you initially acquire a disc in Encase format, but need a DD image for analysis with a specific tool, you can blow back a DD image from an Encase image using FTK Imager.
##Image Acquisition
Forensic images can be acquired using a number of hardware and software tools using a wide range of techniquies. Depending on the requirements of a case, one or more techniques may be employed. The end result is the same, though. You’ll get a mathematically verifiable bit for bit copy of a particular storage container.
###Hardware Based Acquisition
Perhaps the easiest acquisition method for a lay person to conceptualize is acquisition with a hardware device. This disc cloner will have plugs for drives on both sides of a box, one for the original and one for the copy. Once everything is plugged in, the analyst will choose from some basic menu options and start the copy. The hardware device will only write in one direction, which protects the original evidence. When the copy is complete, the hardware verifies mathematically that the contents of the copy match the contents of the original.
Hardware imagers can either just mirror a hard drive or output to common formats like Encase or RAW.
These hardware imagers are great because they are fast and easy to use. The imager that I use will output to two drives simultaneuously which is a big time saver.
###Software Based Acquisition
A similar process is acquisition using a tool like FTK Imager (FTKi). In this scenario, an examiner attaches the original drive to his computer through a write blocker of some kind. Software on his computer will then create the image on the local drive or on another external that’s not write-blocked.
Software based acquisition is also used when a machine is being acquired while still turned on. This is common when there are storage arrays attached to the computer or in situations where it’s important to preserve all data that resides in RAM or the investigator needs to document open network connections.
Once again, the software makes the copy and then mathematically verifies that the copy is an exact match to the original.
###Network Based Acquisition
Images can also be acquired over the network using either commercial tools, or some elementary Unix commands like netcat and DD. Network based acquisition is experiencing some growing demand, although to be efficient some serious bandwidth is required. Think about how long it would take you to copy 250GB of data over the internet or across your corporate network.
##Practical Use
The easiest way to work with a forensic image is to grab a copy of FTK Imager from Access Data. It’s free, and incredibly powerful. If you’re an attorney who merely wants to get into the data to look at some of your client documents or mount a PST for some cursory review it’s image mounting feature is top notch.
Of course an analyst will use many other tools such as Encase, FTK Lab or Internet Evidence Finder but for some quick and dirty analysis FTKi can’t be beat.
-
Building Project Files with Sublime
After a few months living with Sublime as my primary editor it’s become an invaluable tool to how I get all kinds of work done. One of the most powerful aspects of Sublime is it’s find and replace tools. This article will discuss how you can create consistent project files using a template and the find in folders feature of Sublime.
##Where this Workflow Fits
When I perform a forensic exam of a computer, I like to keep notes and tool output in plain text format where I can. I’ve come up with a folder structure that has worked in most situations and scales from an examination of a single computer to many. The key to keeping all the information organized is to distribute information about the case amongst all of the individual files. For example, I want every text file to contain the client and matter name. I want every file related to a specific machine to contain information about the disc image.
##Building The Structure
First you’ll want to build out a template folder structure. My structure looks something like this:
z-CaseTemplate \Reports \Notes \Databases \IEF \FTK \Nuix \Analysis \NAME-HDD-001 \Registry \AcquiredHives \ToolOutput \RegRipper \Web History
You get the picture. From there, start by creating a single README.txt file and type out some sample information. Mine looks something like this:
Client Name: \(ClientName Matter Name:\)MatterName C/M Number: $$BillingNumber
Case Contacts
Scope and Objectives
Deliverables and Timeline
I am using a double dollar signs without spaces as the target for my find-replace move using the editor. This header information shows up in all the text files that I use throughout the project. Once I get to the media level, I’ll add some additional information. At that level the text file headers look something like this:
Client Name: \(ClientName Matter Name:\)MatterName C/M Number: $$BillingNumber
Media Identifier: \(MediaID Image Acquired By:\)ImageMaker Date of Image: \(ImageDate MD5:\)ImageMD5 SHA1: $$ImageSHA1
-
The Importance of Keyboards
We interact with computers by looking at the screen, touching the keyboard and directing the pointer. Performance is an important factors in making a good computer, but the experience when performing these three actions is what can make a computer either great or terrible.
The first keyboard I purchased individually was a virtually indestructible keyboard when I was in college. I purchased this shortly after learning that gin, tonic, limes and keyboards don’t mix very well. While the keyboard looked really cool, it was the first keyboard that I used that seemed to have contempt for the user. You had to jam the hell out of the keys which made typing exhausting, tedious and slow.
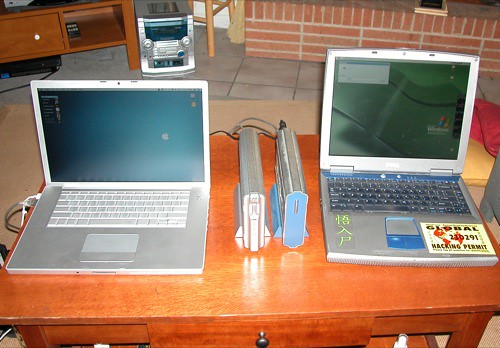
It was when I started law school that I moved to a laptop as my primary machine. My Dell Inspiron was a great laptop with a keyboard that I never complained about and a really nice trackpad for its time. It was when I got the MacBook Pro that I really started to get snobby about the keyboards. From the backlit keys to having a solid feel, it was the nicest keyboard that I’d used.
It seems that after 2003, Dell really started to cut corners on their keyboards and trackpads. I’ve used a number of firm issued Dell laptops and they just keep getting worse. My current Dell laptop keyboard is so bad that it’s unreliable to type with. For some reason they continue to include the little eraser style pointer which was bad since it was introduced back in the mid 1990s. I’ll occasionally touch the damn thing and suddenly the cursor is in a random position on the screen. The trackpad is embarrassing and has buttons on top and bottom. The top buttons also get in the way of typing. The keyboard is backlit, but it’s done in a sloppy way so that light leaks everywhere. I hate that laptop with the power of a thousand suns, and I’d feel that way no matter what OS was installed or how much horsepower was inside.
This experience pales in comparison to the keyboard and trackpad that are on my Asus 4G Surf netbook. The keys are small and cramped to the point that typing is more of a three finger affair and the trackpad kind of works.
This brings me to my current keyboards. The MacBook Air, a wired full size Apple keyboard, the Apple Bluetooth keyboard and a Microsoft Ergonomic Keyboard.
The chicklet style keys on the current Apple keyboards are nice, although I still prefer the style that were found on my old 15” MacBook Pro. All of these are more flat than traditional keyboards but the bluetooth keyboard seems to have a slightly greater incline than the wired version. I prefer the greater incline, but the utility of a 10-key outweighs it for use in my home office.
The reason that I recommend getting the Apple keyboard and the Origami Workstation for the iPad instead of one of those integrated cases is that you’re getting a real keyboard with zero compromises.
The Microsoft keyboard at my office is great, but there is room for improvement. While the keyboard isn’t too mushy, it could have better physical feedback. While there are a lot of extra programable buttons, Microsoft has cluttered the keyboard with too many buttons which are tied to specific functions. While I’m sure that a lot of folks like that math symbols have dedicated buttons above the 10-key, I’d rather see an extra set of function keys like I have on my wired Apple keyboard.
The resurgence of popularity of mechanical keyboards is interesting, although I have yet to pull the trigger on one. There is the Tactile Pro which has been Mac centric for a while and the newly Mac centric Das Keyboard. While the Das seems to be getting all the attention, it’s quite possibly one of the ugliest things I’ve ever seen. As Ben Brooks points out, it’s really just a Windows keyboard with different key labels for OS X.
M/A
-
The Jawbone Era
That guy. You know who he is. Talking to himself on the elevator, at the grocery store and in the car. You have no clue whether he’s talking to you or someone else. In addition to the gold chain around his neck and the cell phone holster on his belt you’ll eventually notice the thing hanging out of his ear and then it makes sense.
Recently I became the owner of a new Jawbone Era headset and therefore something new to feel self conscious about. I never considered using a Bluetooth headset because the utility didn’t outweigh the costs. Calls sounded bad on the receiving end, weren’t loud enough on the callers end and you looked like a total chump. Fortunately (or unfortunately) this headset works well enough in a number of situations where it’s just too darn handy not to have around. You’ll probably still look like a real dweeb.
##When a Headset Makes Sense
I wanted to get the headset primarily for use at my office. Last year we were all issued some fancy new Cisco phones that would work with a Bluetooth headset. I’ve been using a wired headset for a long time and really find it to be useful, especially on extended calls.
The fact that the iPhone has more advanced voice control features is also a plus and keeping both hands on the wheel has got to be safer than the alternative.
##How it Actually Works Out
The Jawbone has pleasantly surprised me so far. It is loud, makes clear phone calls and brings the ability to listen to podcasts through a wireless earpiece. Siri performance is pretty spotty and battery life is far shorter than advertised but overall it’s a net win.
##Style
It’s impossible to not look like a dork when wearing a Bluetooth headset so you should only use it in situations where it’s clearly acceptable or you really don’t care. In your office and on the phone is fine. In the hallway isn’t. If you’ve changed clothes to prepare to go somewhere, you should leave it in the car when you get there. This headset in particular is small and doesn’t have any blinking lights to eat power and further draw attention to your sartorial ineptitude.
##Setup
The Era comes with a number of earbuds in differing sizes. It’s really tough to swap these out, which is a very good thing. My Bose earbuds have a similar molded silicone earbud which has a real problem with falling off while they’re in a bag. There’s nothing worse than loosing one at the beginning of your trip at the airport.
The packaging says that it includes a USB cable and an AC adapter. Unfortunately the AC adapter still needs the USB cable to connect the headset directly to power. A charge time of about an hour through USB makes this kind of useless.
The Jawbone software can be downloaded off their website. This is exactly the kind of thing that ought to be distributed through the Mac App Store, especially since this annoying software which will probably only be used once or twice tries to become a startup item and stakes a claim in the OS X menu bar.
Oddly enough, management of software happens through the browser and only uses the desktop software to push updates. This is bizarre and lazy, but the site worked just fine in my Flash-free installation of Safari.
After running the software update I added the software which enables access to Siri and looked through the voice options. Each of the voice options is exactly the type which you’d expect to appear in the heads of the typical Bluetooth wearing jerk. I settled on the least terrible, loaded it up and moved along.
##iPhone Use
From what people tell me, the audio quality is every bit as good as mashing the iPhone against my face. The voice that announces caller names pulls from an internal set of names and number that I haven’t’ set up. If it could read the name that comes up on the phone it would be better.
Streaming audio ends up being a pretty solid feature. It’s terrible for listening to music but great for listening to podcasts. Mids and highs are clear and loud enough to hear. It’s really nice to work around the house while using this for podcasts since there’s no cord to snag.
##Siri
The interaction between the Era and Siri is a bit of a mixed bag. Even with the right software installed it seems like too much is going on at once. When you push the button on the headset, it beeps then makes some kind of a warbling sound. Don’t be fooled…it’s not time to start talking yet. Eventually (nearly 4 and a half seconds later) you do hear the familiar Siri chime but probably after you’ve already issued half of a command. Sometimes you won’t even hear that. Worse than this is that Siri seems to have a hard time understanding what’s coming through the Era. This whole aspect of the experience is pretty disappointing.
##The Office Phone
The Era can pair with multiple devices at once, which it does pretty well. Getting a full day’s use out of the Era without plugging it in is pretty tough. Charging doesn’t take long though, so if it’s plugged in during a meeting then it will be fully charged upon return.
I really like having some music going while I work, but phone calls seem to keep that to a minimum. The Era’s noise cancellation feature works wonders in this regard. Music playing from an iPod dock at a reasonable level can’t be heard by the person on the other end of the phone.
##Overall Impressions
I’m still using the Jawbone era even though the novelty has faded. It’s nicer to use than a wired headset at work and does an acceptable job making phone calls with the iPhone. Hopefully some software update will come along and make Siri more usable but even as it is right now it’s a pretty solid product.
subscribe via RSS